Congratulations if your reading this your actually thinking about painting your miniatures. This makes you part of a very select group if you didn't know it. Statistically most gamers never even try to paint their armies. Whats worse many more never even finish. But your not going to be one of them are you? No! Not you, so lets get to painting.
Before we dive into an overly long conversation about products and techniques lets take a step back and look at the big picture for a moment. Right now your imagination is running wild. How do I know this? Because your wanting to play a non-video game. A.K.A a game that is not pre-packaged Imagination. So I know you have one, and if your like me you have visions of perfectly painted legions marching across the table towards your whimpering opponent.
Well hold that dream close because we need to face reality. And reality is that painting any miniature to the vision you see in your head is a tremendous amount of work. And if were being honest with ourselves we know we just don't have that much free time or interest. So what level of detail can we achieve and still finish the army? Let me offer you four levels of completion.
Level 1: Clean Base Coat and Liner
Level 2: Level 1 + highlighting and shadowing + decals
Level 3: Level 2 + 2 additional layers of shading and highlighting + Decals
Level 4: Perfection
The most important thing about miniature painting for a uniformed force is keeping it uniform! If you decide that level 2 is the best you can do for 40+ models then you need to stick to level 2 across all the miniatures. You use the same colors the same style and so forth until the entire project is done. Ideally these miniatures should all be painted around the same time to keep the project as consistent as possible. Make sense?
Being a Painting Factory
But I have so much stuff!! Well break it down into manageable lots. Lets start with 12 Regult Battle Pods. There all going to be identical in color if not poses. Line them up on your table and pick your first color. Paint that color on all of them on the same places. Be consistent, be uniform. Pick your next color, do the same with it. Then your next, your next, your next. congratulations you have finished 12 Battle pods. This is how your going to paint large numbers of units.
Don't be Heroic!
Ah your looking at that officer unit aren't you? He's got to be special right? Sure he's got the same mecha but you and I know he needs to look more important. STOP!! Don't do it! Lay down the paint brush, and set that miniature aside in a special place. You see you were about to make a huge mistake. You were about to spend three times the effort you put into your regular pieces on just one miniature. But that would have been a mistake. Why? because when you got done you would be worn out that's why. Putting that much effort into a single miniature when you have an entire force still to paint is very discouraging. I know I have been there many times. So save yourself some grief and do it last. Then when all the rank and file are done you can pour all your creative fervor into that one guy and elevate him to painting perfection. Then exhausted from your labor you can proudly set him at the heard of a force you can be proud of!
That's it.
Wasn't that simple? You picked a level to paint at. then you lined up all the units that were going to be painted the same. Last you worked on your unique, special units that you decided to go wild on. Man this painting thing is easy! Whats wrong? Why do you look so confused?? WHAT!?! You want MORE details? What do you mean whats a basecoat?!?! *sighs*
Ok, I guess were going to have to go into some more depth and a good deal more information. Well keep everything I have said so far in mind. Don't forget any of it. Always keep the big picture clearly in your mind while working on a long project like this. Yes I said long. This is going to take time, but you CAN DO THIS. And you will. But here is the pay off. Your going to have a lovely army. A uniformed force that even if the individual units don't look like the vision in your head over all on the table its going to be fantastic!
How to Paint Robotech Tactics
Moderators: Phaze, Immortals, Supreme Beings, Old Ones
-
godsgopher

- Wanderer
- Posts: 91
- Joined: Mon Aug 18, 2014 11:57 am
Re: How to Paint Robotech Tactics
Part 2: Tools of the Trade
Lets talk about your painting tool set for a little bit. Your painting tools can actually be a source of great frustration and can actually create more work for you than you may realize. A bad brush for example can double the painting time required and make things like fine lines seem like an unobtainable goal. I'm going to break the tool set down into several areas.
1. Lighting
2. Vision
3. Paint Pallet
4. Brushes
5. Paints
6. Other
Lighting is extremely important not only so you can see the details of the miniature but something you may not realize is that all colors that you see are reflected light. This means if your working under a yellow indoor light (soft white) its going to change the colors that your seeing on your miniature. I suggest you get an adjustable lamp that you can get directly over your miniature while your working. This should be fitted with what is known as a Daylight bulb. Daylight bulbs are true white light bulbs.
White light is the best for seeing the true color of the miniature as its going to appear under sunlight. Consequently did you know that the Sun is actually white and not yellow? Seriously its true, look it up. NASA actually colors the sun in space pictures yellow because that is what it looks like from Earth. So you want white light. A strong light to see every detail on the miniature as well as seeing the true colors your painting.
People who have seen some of my stuff in real life often ask me if I work under a magnifying glass. Well sort of, I use a Jewelers hood with a x2 and x3 magnification. Why? Because much as I hate to admit it, I'm getting old and I just don't see everything on the miniature I wish I did. *Cries* This was brought home to me several years ago when someone said "The miniature looks perfect except for that uni-brow on her." I looked at it and couldn't see the uni-brow. Several other people commented about the brow, I looked again, couldn't see the $&@^ thing!!! I realized that I had a problem...
So my question is can you really see the miniature? Good vision improves your brush control immensely. Without it you might be very surprised what your missing.
This might seem an odd thing to list as a major tool. I mean whats the point? your ether painting out of the bottle or your putting paint on a pallet and painting from that right? Yes.. you could be doing it that way. I did for years until I heard about something called a Wet Pallet. The biggest problem with a traditional pallet and acrylic colors is they dry out very quickly. You usually can't keep more than one or two colors going at once before they just dry out on you. So you have to spend all your time on that one color working quickly and occasionally re-mixing the color to thin it down to the right consistency.
With a wet pallet you can change all that. Instead of having twenty minuets to work with a color you can have 4+ hours. How? Because the pallet is wet! It doesn't dry out. But your wondering what IS a wet pallet? Alright the simple version for those of you who don't want to go down to the hobby store and spend 30$
I like to use a Warmachine plastic miniature lid that I have filled with left over metal (heavy) bits and resealed. I flip it over so its back is pointing upwards. Into the little bowl I fold up a piece of paper towel. I then soak this in water and drain any excess but leave it very damp. Over this I place a single cut piece of wet pallet paper (think wax bible paper). The water soaked into the paper creating a moist layer onto which I will directly add my paint drops. The drops are sitting on paper, but its constantly wet and will not dry out.
Now I can work in as many colors as I have room. Mixing is a breeze! I can leave a color for an hour and then come back to it and touch up a spot if that's whats needed. No need to remix my paints its all still on the pallet. I have just eliminated hours of frustrating work!
I have to tread lightly here. You want to start a war bring up brushes to pro-painters. I'm not going to talk brands I'm going to talk Synthetic vs. Natural hair. If your pulling on your shoes to go to hobby lobby, hold up a second. All your going to find there are a range of moderately prices synthetic brushes. Are synthetic brushes bad? *mumbles under his breath* Well not exactly. If your new to painting that's exactly what you should be using. They have their uses. in truth there is only one point I want to make about them. They don't keep one...
A point that is, they don't keep it. After about one or two miniatures its going to look like you have been chewing on it. Natural hair brushes (if properly cared for) will last much much longer! They also keep their points very well and while much more expensive will generally last far longer than the cheap brushes that were on sale.
The price range? your looking at 20+ $$$
Breath!!!
In, Out, In, Out, you had my worried! You were turning blue there for a moment. All I am saying is think about it. If your an experienced painter a good brush might help you cross the barrier to taking your skills to the next level. Its amazing how fighting a bad brush can hold you back.
What discussion of painting tools would be complete without talking about paint? If you thought the brush issue was a landmine, welcome to the super-volcano. Now I am not going to go deep into this, experience really is the best teacher. I do however want to talk about the qualities of a good paint. Then Ill mention a few brands.
Paint should be liquid. Don't look at me like that. Its creepy! I'm being serious you don't want paint that's all dried up in the bottle. All paint should be thinned so it does not lay heavily on the miniature. And dry paints have to be thinned a lot! You want a paint that does not separate easily. If it does you will be endlessly remixing it to keep the color together.
Paint should come in a dropper bottle. Why? So you can get a measured amount out of the bottle when you want it of course. I'm looking at you Games Workshop! Using a dropper bottle getting a 50/50 mix is much easier. Other wise your trying to eye-ball it to keep the consistence when mixing colors. Dropper bottle also don't dry out very quickly. YES I'm looking at you Games Workshop!! Dropper bottles also don't spill if your having a clumsy moment. YES I'M LOOKING AT YOU GAMES WORKSHOP!!!
*coughs*
Excuse me.
Games Workshop
Don't come in dropper bottles. However their formulations are good the paint is consistent. Unfortunately they have a habit of renaming your favorite colors just when you think you know what they are. They have also been known to reformulate their entire line suddenly so your favorite colors are no longer available. Their color range tends to be very vibrant with the idea of painting fantasy / sci-fi miniatures. So don't expect many subtle earth-tones here.
Reaper Paints
Reaper miniatures makes a very fine line of paints. The colors are good and the verity is excellent. The best thing is if your not good at mixing shades and highlights Reaper has a tri-color set up where you get your Base color, highlight and shade pre-set. This is perfect for a new painter. I highly recommend. However if you are using an Air-brush their paint can be rather thick in pigment so its hard to shoot.
Vallajo Paints
A great paint company broken into three primary lines (more actually) Model Color (realism / WWII) Game Color (sci-fi / Fantasy, but glossy) and Panzer Color (WWII Tanks)
Excellent paints over all but a bit runny. This does however make the wonderful for shooting through an air-brush. Personally I own both Reaper and Vallajo paints, fantastic products.
Others
There are SO many paint makers. Each have there ups and downs. The only thing I absolutely recommend avoiding is the large bottle acrylic paints from Hobby Lobby. Those aren't designed to painting ultra thin layers on miniatures. So save yourself some pain and just don't go there.
To be continued....
Lets talk about your painting tool set for a little bit. Your painting tools can actually be a source of great frustration and can actually create more work for you than you may realize. A bad brush for example can double the painting time required and make things like fine lines seem like an unobtainable goal. I'm going to break the tool set down into several areas.
1. Lighting
2. Vision
3. Paint Pallet
4. Brushes
5. Paints
6. Other
Lighting
Lighting is extremely important not only so you can see the details of the miniature but something you may not realize is that all colors that you see are reflected light. This means if your working under a yellow indoor light (soft white) its going to change the colors that your seeing on your miniature. I suggest you get an adjustable lamp that you can get directly over your miniature while your working. This should be fitted with what is known as a Daylight bulb. Daylight bulbs are true white light bulbs.
White light is the best for seeing the true color of the miniature as its going to appear under sunlight. Consequently did you know that the Sun is actually white and not yellow? Seriously its true, look it up. NASA actually colors the sun in space pictures yellow because that is what it looks like from Earth. So you want white light. A strong light to see every detail on the miniature as well as seeing the true colors your painting.
Vision
People who have seen some of my stuff in real life often ask me if I work under a magnifying glass. Well sort of, I use a Jewelers hood with a x2 and x3 magnification. Why? Because much as I hate to admit it, I'm getting old and I just don't see everything on the miniature I wish I did. *Cries* This was brought home to me several years ago when someone said "The miniature looks perfect except for that uni-brow on her." I looked at it and couldn't see the uni-brow. Several other people commented about the brow, I looked again, couldn't see the $&@^ thing!!! I realized that I had a problem...
So my question is can you really see the miniature? Good vision improves your brush control immensely. Without it you might be very surprised what your missing.
Paint Pallet
This might seem an odd thing to list as a major tool. I mean whats the point? your ether painting out of the bottle or your putting paint on a pallet and painting from that right? Yes.. you could be doing it that way. I did for years until I heard about something called a Wet Pallet. The biggest problem with a traditional pallet and acrylic colors is they dry out very quickly. You usually can't keep more than one or two colors going at once before they just dry out on you. So you have to spend all your time on that one color working quickly and occasionally re-mixing the color to thin it down to the right consistency.
With a wet pallet you can change all that. Instead of having twenty minuets to work with a color you can have 4+ hours. How? Because the pallet is wet! It doesn't dry out. But your wondering what IS a wet pallet? Alright the simple version for those of you who don't want to go down to the hobby store and spend 30$
I like to use a Warmachine plastic miniature lid that I have filled with left over metal (heavy) bits and resealed. I flip it over so its back is pointing upwards. Into the little bowl I fold up a piece of paper towel. I then soak this in water and drain any excess but leave it very damp. Over this I place a single cut piece of wet pallet paper (think wax bible paper). The water soaked into the paper creating a moist layer onto which I will directly add my paint drops. The drops are sitting on paper, but its constantly wet and will not dry out.
Now I can work in as many colors as I have room. Mixing is a breeze! I can leave a color for an hour and then come back to it and touch up a spot if that's whats needed. No need to remix my paints its all still on the pallet. I have just eliminated hours of frustrating work!
Brushes
I have to tread lightly here. You want to start a war bring up brushes to pro-painters. I'm not going to talk brands I'm going to talk Synthetic vs. Natural hair. If your pulling on your shoes to go to hobby lobby, hold up a second. All your going to find there are a range of moderately prices synthetic brushes. Are synthetic brushes bad? *mumbles under his breath* Well not exactly. If your new to painting that's exactly what you should be using. They have their uses. in truth there is only one point I want to make about them. They don't keep one...
A point that is, they don't keep it. After about one or two miniatures its going to look like you have been chewing on it. Natural hair brushes (if properly cared for) will last much much longer! They also keep their points very well and while much more expensive will generally last far longer than the cheap brushes that were on sale.
The price range? your looking at 20+ $$$
Breath!!!
In, Out, In, Out, you had my worried! You were turning blue there for a moment. All I am saying is think about it. If your an experienced painter a good brush might help you cross the barrier to taking your skills to the next level. Its amazing how fighting a bad brush can hold you back.
Paints
What discussion of painting tools would be complete without talking about paint? If you thought the brush issue was a landmine, welcome to the super-volcano. Now I am not going to go deep into this, experience really is the best teacher. I do however want to talk about the qualities of a good paint. Then Ill mention a few brands.
Paint should be liquid. Don't look at me like that. Its creepy! I'm being serious you don't want paint that's all dried up in the bottle. All paint should be thinned so it does not lay heavily on the miniature. And dry paints have to be thinned a lot! You want a paint that does not separate easily. If it does you will be endlessly remixing it to keep the color together.
Paint should come in a dropper bottle. Why? So you can get a measured amount out of the bottle when you want it of course. I'm looking at you Games Workshop! Using a dropper bottle getting a 50/50 mix is much easier. Other wise your trying to eye-ball it to keep the consistence when mixing colors. Dropper bottle also don't dry out very quickly. YES I'm looking at you Games Workshop!! Dropper bottles also don't spill if your having a clumsy moment. YES I'M LOOKING AT YOU GAMES WORKSHOP!!!
*coughs*
Excuse me.
Big Paint Brands
Games Workshop
Don't come in dropper bottles. However their formulations are good the paint is consistent. Unfortunately they have a habit of renaming your favorite colors just when you think you know what they are. They have also been known to reformulate their entire line suddenly so your favorite colors are no longer available. Their color range tends to be very vibrant with the idea of painting fantasy / sci-fi miniatures. So don't expect many subtle earth-tones here.
Reaper Paints
Reaper miniatures makes a very fine line of paints. The colors are good and the verity is excellent. The best thing is if your not good at mixing shades and highlights Reaper has a tri-color set up where you get your Base color, highlight and shade pre-set. This is perfect for a new painter. I highly recommend. However if you are using an Air-brush their paint can be rather thick in pigment so its hard to shoot.
Vallajo Paints
A great paint company broken into three primary lines (more actually) Model Color (realism / WWII) Game Color (sci-fi / Fantasy, but glossy) and Panzer Color (WWII Tanks)
Excellent paints over all but a bit runny. This does however make the wonderful for shooting through an air-brush. Personally I own both Reaper and Vallajo paints, fantastic products.
Others
There are SO many paint makers. Each have there ups and downs. The only thing I absolutely recommend avoiding is the large bottle acrylic paints from Hobby Lobby. Those aren't designed to painting ultra thin layers on miniatures. So save yourself some pain and just don't go there.
To be continued....
Last edited by godsgopher on Thu Aug 28, 2014 10:29 am, edited 2 times in total.
-
godsgopher
- Wanderer
- Posts: 91
- Joined: Mon Aug 18, 2014 11:57 am
Re: How to Paint Robotech Tactics
Part 3: Actually doing some Painting
Wow, two whole write ups and I have managed to avoid talking about the one thing you came to this page to learn! I should have gone into politics. Ah well you have stuck with me this long so I guess I should... you know... talk about the painting thing.
Priming
So pick up your paint brush!
Pick up your miniature!
Grab your Paint! ...NO WAIT!!!
Stop!!
Set your brush down a moment. I want you to take a moment to look at your miniature. Yep there it is. Are you looking at it? No I mean are you really looking at it?? Good, because I want you to start painting the miniature in your mind. No this isn't some kind of Zen thing. I'm being serious. I want you to start putting color on the miniature in your mind. See the colors next to each other. Do they look good together? Do you know where all your colors are going to go?
You need to plan out what your doing. The more you plan the better the miniature will turn out when your done. Good artist don't accidentally paint great miniatures. They know pretty much what its going to look like before the first drop of paint is lovingly smeared across its surface.
Remember back at the beginning when I told you to chose a level to paint to? Well I need to you still remember that, because here we go were about to make that plan and the image in your head into a reality!
Now! Pick up your Paint Brush!
A base coat is more than just the first color you put on the miniature. Its the foundation of every color on the miniature. All shadowing and highlighting that you will be doing later is going to be based off the primary color. And because all painting is done in layers you want those layers to be as smooth as possible. To achieve that you MUST thin your paints. Now pros use all kinds of neat art supplies to thin their paints and extend drying time. For me I use a natural product called Di-Hydrogen Oxide. Thats H2O. Ok dag-nab-it its water plain old straight out of the cup water!!! I'm cheap, you caught me!
If your working on a wet pallet like I recommended you want to be careful with this one. The easiest way to add water without turning your paint into a puddle is to simply dip your brush into your water cup and then mix your paint. This is very controllable and moving your paint around on the pallet you can control the consistency from soupy to wet.
With your thin paint I want you to cover your first area with your chosen color. Ah your already making a mistake. Yep. Its a failure! Might as well throw it all away. Your never going to amount to anything... Its just your first color and your already thinking like that. I want you to stop. Don't go there, your defeating yourself before your done.
So your still painting good. But you have run into another problem. The paint isn't covering your primer. You thinned your paint just like I said but its not covering. See! You paint a spot and you still see primer! The paint is too thin, this is all your fault Gopher! Oh ye of little faith. Did I say anywhere in this article that painting a surface one time would cover it? No I did not. Its going to take multiple coats. Probably two and maybe three. If its taking more than that you have thinned your paint too much, OR your trying to paint yellow. Yep, yellow is the trouble maker of the painting world. So calm down and don't rush. I told you at the beginning this was going to take time. You want your base coat to be smooth and thin because its likely quite a few other coats are going to go over it.
Stop! Don't paint that! Its still Wet!
Whew! that was close. Glad I caught you. Never, ever paint over drying paint. Let it dry completely before you touch it again. Why? Well half dried paint can be like skim on a wet surface. It you touch it with the brush the top surface which is dry will tear and the wet part underneath will be exposed. This causes your even coat to become uneven. And whats worse these areas are very difficult to repair. So let the paint dry! Work somewhere else.
All done?
So you base coated everything did you? humm.. yea it looks ok. Wait I see primer there, better touch it up. Oh I think your main color is getting out of the lines. Use your wet pallet to touch that spot up. humm... I think this area need another coat its not looking even. Yep... I think that got it. Your done. Your Base coat is finished. Well done.
Do you watch cartoons? Well if your on this forum I suspect you have seen at least one cartoon. Go back and watch your favorite episode of Robotech. I want you to notice something. Look where two colors meet on your favorite character. Do you see that? Look really close. There is a thin black line separating the two colors. See..
http://www.capsulecomputers.com.au/wp-c ... lineup.jpg
Now notice what it looks like without it...
http://wall.alphacoders.com/big.php?i=20709
Much less distinct isn't it? Lining is the difference, and its the next step on our list. Now there are two main ways to line a miniature. The Easy way and the Hard way. Which do you want? You want the easy way don't you? I thought so... amateur.
This will probably be the only time you will see me do this. I'm going to recommend a Games Workshop product to you. I really don't want to do this, but in blunt honestly. In this one case. Its the best thing to do. GW has a series of "washes" that are specifically made to flow down into the cracks and crevices of a miniature. And that is exactly what we want. Use a synthetic brush for this. Chose your wash color they have a great selection. Now dip your brush into the pot (Also the only time you will hear me say that!) and paint (wash) the deep lines of your miniature. Pay particular attention to the boarders where two diffrent colors meet. You want a darker (than your paint) line.
But..but... its going everywhere. Yes yes I know. Keep washing. But but.. its on my white! (read the news ignoring you) "Keep washing". Are you don't yet? Whats the matter? Don't get mad at me. You knew the base coat was going to get painted over. Now that your done and its completely dry you need to go back with your base colors on your wet pallet and clean up the mess you made. Really, making scary faces at me isn't going to make that miniature any prettier back to work.
Second option
Perhaps you dont want to run out to your local game store and buy yet another product. You can make your own liner easily enough. just get your traditional artist pallet. You know the one I suggested you stop using and place a drop of a dark colored paint you want to use for lining. Now add water at somewhere around a 4 to 1, or 6 to 1 ratio depending on the strength of the pigment. Get it down to the consistency of skim milk. Now wash the cracks and crevices of the miniature to darken those recessed lines much like you would have done if you were using one of the GW washes. Clean up as above.
You didn't like that amateur comment did you? Going pro are we? Think your patient enough to paint with the big boys? Good. Lets to it the hard way. By hard I mean the long, careful, steady-hand way. Because what your going to do is very similar to the second option above except your not going to thin the paint any more than what you did for the base coat. Then your going to paint each and every line on the miniature. Yes I do mean ALL of them. you want clean precise lines. Make sure you have your wet pallet around so you can come back and clean up your mistakes because we all make them when doing this.
Well you did it. that's all there is to painting level 1. A nice clean base coat with a liner to make it distinct. Then you cleaned up the washing and all's well.
What? You want more?!?! glutton for abuse aren't you? Very well then..
Moving onto level 2 painting and frankly this is as far as I would recommend going unless your an obsessive freak who MUST have the best painted army in the state. Because trying to complete an entire army at level 3+ is going to make more time than most of us have if we work a job. What were going to add here is Shadows and highlights.
All light is reflection
Well a quick background. If your holding your miniature under the lamp your going to notice its brighter on top and casts a shadow on the bottom. I know, I'm a genius to notice that... shussh! i'm trying to learn you something. My point here is light comes from somewhere. Things are brighter closer to the light source and darker further away. For wargaming miniatures we typically assume the light source is coming from directly above the miniature. So when painting highlights you want the surfaces of the miniature closer to the top to be a lighter color to fake this real world effect.
Lets start with some shadows. now your probably wondering what color to use right? Well if your using the Reaper color paints they actually have shadow paints already picked out for you. I generally aim for about two shades darker than my base coat. What do I mean by darker? I mean heavier tone. What is tone? Look just take a dab of black and mix it in to your base coat alright? See how much darker it is now? that's a shadow. Were going to apply that everywhere the sun doesn't shine.
Holy Crap! I didn't say paint that much shadow! This isn't moon light were painting. You saved some of your base coat color on your wet pallet right? Good. re-paint your base coat but leave some shadow. Yea thats it, your getting it! No! NO! Stop that's too *facepalm* that too much. Yes go back and shadow some more. Little more... little more... perfect! Oh there is a drop of your shadow on top of the miniature. No its not ok to leave it, get some of your base coat and clean it up.
Yep thats how its done. You work back and forth between your shadow and your base coat until the shadowed areas look about right. No one, not me, not big named pro painters ever get it right on the first go. So you end up going back and forth until it looks right to your eye.
Yep you guessed it were going lighter this time. Hu? That's right! its the same process as the shadow! good to see your paying attention. So just pick a lighter color form the reaper line or add a little white to your base color if your confused what a lighter shade should look like. Yep now your getting it. Your on your way!
And your done...but wait... Umm... something is not right here.
You seem to have painted 33% of the miniature in shadow, 33% the Base color, and 33% highlight... Thats not going to work. Why? Because you cant tell what the real color is that's why. All you have is a gradient from dark to light. but in order to convince the eye that you are seeing shadows and sunlight areas these areas need to be smaller than your overall base coat. How much smaller?
I'd say as a general rule you want 50% of the miniature to be the base coat color. And the other 50% to be shadow and highlight. This is a general rule of thumb of course, experience is your best teacher.
So maybe right now your thinking all this highlighting is too much work, there has got to be a faster way to do all this. Well there is but I'm kind of hesitant to mention it to you. You see if I tell you about Dry Brushing your going to get all excited, your going to think this highlight stuff is a breeze. And then when you decide to get into advanced painting I'm going to have to convince you not to do it. Because pro's don't really dry brush if they can help it.
But I can see that gleam in your eye, there's no putting you off, fast and easy it is then. So pick up a paint brush...No! Not that one! That's a nice brush. Its still got a lovely point, all the bristles come together at the same length. No the ratty one in the corner sulking because you don't love it anymore. That's the brush we want. The poor brush you once loved now forgotten because it has no point, its thread bare and tattered. But were going to give that brush new life! Today its becoming a dry brush!
Now pick your highlight color and load that poor old brush up with some paint. Your going to want a paper towel handy for this by the way. Now I want you to wipe all the paint off it by brushing it back and forth on the paper towel. Why are you looking at me, I'm not crazy, this is a real technique. Yes, there you go, now most of the paint should have been wiped onto the towel. Now even though you cleaned the brush off on the dry towel there is still paint on the brush.
Take your miniature and begin by using short quick stokes and brush the surface of the miniature on the areas you with to apply your highlight. Think of it like using a feather duster. There your starting to leave traces of your highlight color on the surface. Its building up very slowly but its there. Each raised area and corner is becoming brighter with the highlight color. After a while your brush will dry out and no paint will be left in it. just reload and repeat.
A few notes here. You don't want to over do it. If you over do it you have two choices. First you can repaint the area and try again. Or you can apply a wash (see advanced section) to tone down the dry brushing. Dry brushing is most effective on raised areas on the miniature. So trying this technique for applying shadows is likely to produce unsatisfactory results.
So on to decals. Cut them lose from the sheet, hold them with a pair of tweezers in your water cut for 45+ seconds and then use a clean paintbrush to slide the water transfer decal over to the mecha. Bingo your done!
That it, that's all there is to level 2. You look tired. I think you better take a break. Point of fact if you can actually get this far with your entire army your probably going to have one of the top armies at any gamestore. I'm not kidding. Remember most people quit and give up long before the get here. You have done well. Now you go enjoy that wonderful feeling of accomplishment you have earned.
Wait? your still here? you want to do more? dude.. I think you need professional help. Alright, alright, Lets move onto Advanced painting...
TO BE CONTINUED
Wow, two whole write ups and I have managed to avoid talking about the one thing you came to this page to learn! I should have gone into politics. Ah well you have stuck with me this long so I guess I should... you know... talk about the painting thing.
Priming
So pick up your paint brush!
Pick up your miniature!
Grab your Paint! ...NO WAIT!!!
Stop!!
Set your brush down a moment. I want you to take a moment to look at your miniature. Yep there it is. Are you looking at it? No I mean are you really looking at it?? Good, because I want you to start painting the miniature in your mind. No this isn't some kind of Zen thing. I'm being serious. I want you to start putting color on the miniature in your mind. See the colors next to each other. Do they look good together? Do you know where all your colors are going to go?
You need to plan out what your doing. The more you plan the better the miniature will turn out when your done. Good artist don't accidentally paint great miniatures. They know pretty much what its going to look like before the first drop of paint is lovingly smeared across its surface.
Remember back at the beginning when I told you to chose a level to paint to? Well I need to you still remember that, because here we go were about to make that plan and the image in your head into a reality!
Now! Pick up your Paint Brush!
The Base Coat
A base coat is more than just the first color you put on the miniature. Its the foundation of every color on the miniature. All shadowing and highlighting that you will be doing later is going to be based off the primary color. And because all painting is done in layers you want those layers to be as smooth as possible. To achieve that you MUST thin your paints. Now pros use all kinds of neat art supplies to thin their paints and extend drying time. For me I use a natural product called Di-Hydrogen Oxide. Thats H2O. Ok dag-nab-it its water plain old straight out of the cup water!!! I'm cheap, you caught me!
If your working on a wet pallet like I recommended you want to be careful with this one. The easiest way to add water without turning your paint into a puddle is to simply dip your brush into your water cup and then mix your paint. This is very controllable and moving your paint around on the pallet you can control the consistency from soupy to wet.
With your thin paint I want you to cover your first area with your chosen color. Ah your already making a mistake. Yep. Its a failure! Might as well throw it all away. Your never going to amount to anything... Its just your first color and your already thinking like that. I want you to stop. Don't go there, your defeating yourself before your done.
Pro-Painting Tip: ALL half painted miniatures look like crap. All of them! I don't care how great you are as a painter your miniatures look like crap until your about 15 minuets from being done with it. Remember this, a miniature will never look good until its finished. And most mistakes can be painted over so long as you don't give up.
So your still painting good. But you have run into another problem. The paint isn't covering your primer. You thinned your paint just like I said but its not covering. See! You paint a spot and you still see primer! The paint is too thin, this is all your fault Gopher! Oh ye of little faith. Did I say anywhere in this article that painting a surface one time would cover it? No I did not. Its going to take multiple coats. Probably two and maybe three. If its taking more than that you have thinned your paint too much, OR your trying to paint yellow. Yep, yellow is the trouble maker of the painting world. So calm down and don't rush. I told you at the beginning this was going to take time. You want your base coat to be smooth and thin because its likely quite a few other coats are going to go over it.
Stop! Don't paint that! Its still Wet!
Whew! that was close. Glad I caught you. Never, ever paint over drying paint. Let it dry completely before you touch it again. Why? Well half dried paint can be like skim on a wet surface. It you touch it with the brush the top surface which is dry will tear and the wet part underneath will be exposed. This causes your even coat to become uneven. And whats worse these areas are very difficult to repair. So let the paint dry! Work somewhere else.
All done?
So you base coated everything did you? humm.. yea it looks ok. Wait I see primer there, better touch it up. Oh I think your main color is getting out of the lines. Use your wet pallet to touch that spot up. humm... I think this area need another coat its not looking even. Yep... I think that got it. Your done. Your Base coat is finished. Well done.
So what next? Lining of course!
Do you watch cartoons? Well if your on this forum I suspect you have seen at least one cartoon. Go back and watch your favorite episode of Robotech. I want you to notice something. Look where two colors meet on your favorite character. Do you see that? Look really close. There is a thin black line separating the two colors. See..
http://www.capsulecomputers.com.au/wp-c ... lineup.jpg
Now notice what it looks like without it...
http://wall.alphacoders.com/big.php?i=20709
Much less distinct isn't it? Lining is the difference, and its the next step on our list. Now there are two main ways to line a miniature. The Easy way and the Hard way. Which do you want? You want the easy way don't you? I thought so... amateur.
Lining: The Easy Way
This will probably be the only time you will see me do this. I'm going to recommend a Games Workshop product to you. I really don't want to do this, but in blunt honestly. In this one case. Its the best thing to do. GW has a series of "washes" that are specifically made to flow down into the cracks and crevices of a miniature. And that is exactly what we want. Use a synthetic brush for this. Chose your wash color they have a great selection. Now dip your brush into the pot (Also the only time you will hear me say that!) and paint (wash) the deep lines of your miniature. Pay particular attention to the boarders where two diffrent colors meet. You want a darker (than your paint) line.
But..but... its going everywhere. Yes yes I know. Keep washing. But but.. its on my white! (read the news ignoring you) "Keep washing". Are you don't yet? Whats the matter? Don't get mad at me. You knew the base coat was going to get painted over. Now that your done and its completely dry you need to go back with your base colors on your wet pallet and clean up the mess you made. Really, making scary faces at me isn't going to make that miniature any prettier back to work.
Second option
Perhaps you dont want to run out to your local game store and buy yet another product. You can make your own liner easily enough. just get your traditional artist pallet. You know the one I suggested you stop using and place a drop of a dark colored paint you want to use for lining. Now add water at somewhere around a 4 to 1, or 6 to 1 ratio depending on the strength of the pigment. Get it down to the consistency of skim milk. Now wash the cracks and crevices of the miniature to darken those recessed lines much like you would have done if you were using one of the GW washes. Clean up as above.
Lining: The Hard Way
You didn't like that amateur comment did you? Going pro are we? Think your patient enough to paint with the big boys? Good. Lets to it the hard way. By hard I mean the long, careful, steady-hand way. Because what your going to do is very similar to the second option above except your not going to thin the paint any more than what you did for the base coat. Then your going to paint each and every line on the miniature. Yes I do mean ALL of them. you want clean precise lines. Make sure you have your wet pallet around so you can come back and clean up your mistakes because we all make them when doing this.
Congradulations! You have cleared Level 1, but our princess is in another castle...
Well you did it. that's all there is to painting level 1. A nice clean base coat with a liner to make it distinct. Then you cleaned up the washing and all's well.
What? You want more?!?! glutton for abuse aren't you? Very well then..
Level 2: FIGHT!!
Moving onto level 2 painting and frankly this is as far as I would recommend going unless your an obsessive freak who MUST have the best painted army in the state. Because trying to complete an entire army at level 3+ is going to make more time than most of us have if we work a job. What were going to add here is Shadows and highlights.
All light is reflection
Well a quick background. If your holding your miniature under the lamp your going to notice its brighter on top and casts a shadow on the bottom. I know, I'm a genius to notice that... shussh! i'm trying to learn you something. My point here is light comes from somewhere. Things are brighter closer to the light source and darker further away. For wargaming miniatures we typically assume the light source is coming from directly above the miniature. So when painting highlights you want the surfaces of the miniature closer to the top to be a lighter color to fake this real world effect.
Pro-Painting Tip: All realistic miniature painting is illusion. You spend much of your time trying to fake things in 28mm scale that happen naturally to real world objects. Why do we bother to do this? Because miniatures are too small to cast the kind of shadows a 8ft Troll would. You have to fake it.
Shadowing
Lets start with some shadows. now your probably wondering what color to use right? Well if your using the Reaper color paints they actually have shadow paints already picked out for you. I generally aim for about two shades darker than my base coat. What do I mean by darker? I mean heavier tone. What is tone? Look just take a dab of black and mix it in to your base coat alright? See how much darker it is now? that's a shadow. Were going to apply that everywhere the sun doesn't shine.
Holy Crap! I didn't say paint that much shadow! This isn't moon light were painting. You saved some of your base coat color on your wet pallet right? Good. re-paint your base coat but leave some shadow. Yea thats it, your getting it! No! NO! Stop that's too *facepalm* that too much. Yes go back and shadow some more. Little more... little more... perfect! Oh there is a drop of your shadow on top of the miniature. No its not ok to leave it, get some of your base coat and clean it up.
Yep thats how its done. You work back and forth between your shadow and your base coat until the shadowed areas look about right. No one, not me, not big named pro painters ever get it right on the first go. So you end up going back and forth until it looks right to your eye.
Now the Highlight
Yep you guessed it were going lighter this time. Hu? That's right! its the same process as the shadow! good to see your paying attention. So just pick a lighter color form the reaper line or add a little white to your base color if your confused what a lighter shade should look like. Yep now your getting it. Your on your way!
And your done...but wait... Umm... something is not right here.
You seem to have painted 33% of the miniature in shadow, 33% the Base color, and 33% highlight... Thats not going to work. Why? Because you cant tell what the real color is that's why. All you have is a gradient from dark to light. but in order to convince the eye that you are seeing shadows and sunlight areas these areas need to be smaller than your overall base coat. How much smaller?
I'd say as a general rule you want 50% of the miniature to be the base coat color. And the other 50% to be shadow and highlight. This is a general rule of thumb of course, experience is your best teacher.
Dry Brushing
So maybe right now your thinking all this highlighting is too much work, there has got to be a faster way to do all this. Well there is but I'm kind of hesitant to mention it to you. You see if I tell you about Dry Brushing your going to get all excited, your going to think this highlight stuff is a breeze. And then when you decide to get into advanced painting I'm going to have to convince you not to do it. Because pro's don't really dry brush if they can help it.
But I can see that gleam in your eye, there's no putting you off, fast and easy it is then. So pick up a paint brush...No! Not that one! That's a nice brush. Its still got a lovely point, all the bristles come together at the same length. No the ratty one in the corner sulking because you don't love it anymore. That's the brush we want. The poor brush you once loved now forgotten because it has no point, its thread bare and tattered. But were going to give that brush new life! Today its becoming a dry brush!
Now pick your highlight color and load that poor old brush up with some paint. Your going to want a paper towel handy for this by the way. Now I want you to wipe all the paint off it by brushing it back and forth on the paper towel. Why are you looking at me, I'm not crazy, this is a real technique. Yes, there you go, now most of the paint should have been wiped onto the towel. Now even though you cleaned the brush off on the dry towel there is still paint on the brush.
Take your miniature and begin by using short quick stokes and brush the surface of the miniature on the areas you with to apply your highlight. Think of it like using a feather duster. There your starting to leave traces of your highlight color on the surface. Its building up very slowly but its there. Each raised area and corner is becoming brighter with the highlight color. After a while your brush will dry out and no paint will be left in it. just reload and repeat.
A few notes here. You don't want to over do it. If you over do it you have two choices. First you can repaint the area and try again. Or you can apply a wash (see advanced section) to tone down the dry brushing. Dry brushing is most effective on raised areas on the miniature. So trying this technique for applying shadows is likely to produce unsatisfactory results.
Decals
So on to decals. Cut them lose from the sheet, hold them with a pair of tweezers in your water cut for 45+ seconds and then use a clean paintbrush to slide the water transfer decal over to the mecha. Bingo your done!
THE END
That it, that's all there is to level 2. You look tired. I think you better take a break. Point of fact if you can actually get this far with your entire army your probably going to have one of the top armies at any gamestore. I'm not kidding. Remember most people quit and give up long before the get here. You have done well. Now you go enjoy that wonderful feeling of accomplishment you have earned.
Wait? your still here? you want to do more? dude.. I think you need professional help. Alright, alright, Lets move onto Advanced painting...
TO BE CONTINUED
Last edited by godsgopher on Thu Sep 18, 2014 4:02 pm, edited 3 times in total.
-
godsgopher
- Wanderer
- Posts: 91
- Joined: Mon Aug 18, 2014 11:57 am
Re: How to Paint Robotech Tactics
Well we have come at last to the advanced painting section. From here we take a dive into the truly deep end of painting. Many of the techniques contained here take a good deal of time to master and can not be described in a paint-by-the-numbers manor. What does this mean for you? It means if you are serious about really painting your going to have to work for it. There is no sure formula for success with any of these techniques. That's why this is art.
You have already heard of highlights and Shadows. What you need to realize is there is no correct number of layers. I might say that painting to Level 3 is two highlights or two shadows but in reality when your going all out there is no limit. You shadow until the shadows look right. Shadows may even be different colors from the base color. Probably its best to say that while there is no "right" shadow or highlight there are however many "wrong" ones. All of this is a matter of experience. Your not going to get it reading articles your going to get it by doing it and experimenting. If there is anything I can share its that you need to be unafrade of failure. You will find no greater teacher than failure.
Sometimes your colors just get too bright, or too light, or too washed out, or too separated because your highlights or shadows are too far apart in color. You may also simple wish to add a second color tint to the area without repainting it. To do this we create washes. A wash is paint that has been thinned down to chicken soup level. Its really colored water. Once you have it tinned properly application is easy. You simply wash the surface you wish to add color to. A few thoughts here. One thing you are going to want to watch is pooling. This is where you have too much water on the miniature. Remember when your mother gripped at you for leaving watermarks on the dishes because you didn't try them properly? Yep that can happen here. If you over wash and leave water marks your going to have to go back in with the base color (or highlight, shadow) and clean the area up before trying again. Key point here is that paint is opaque. So super thin layers can be seen through. Washes can also be uses to unify your colors. Repainting the base coat color but in a wash can help unify your highlight and shadows if they have gotten too extreme.
I'm not going to begin to try and teach you color theory. I'm only going to mention it here so that those of you who are unfamiliar with the term will know you need to have at least a passing understanding of the idea. Essentially color theory is the science of combining colors. Some colors work very well together some not so much. Understanding why and how to combine colors is a major part of professional painting. Good miniatures rarely look like skittles.
Here is a starting point.
http://www.colormatters.com/color-and-d ... lor-theory
Ah blending if I let myself I could talk about this one for hours. But I'm not going to do that to you. No I think Ill just mention its existence and let all of you roam the earth searching in vain for some understanding of this arcane art passed down through the generations. Humm... no wait that doesn't sound fair ether. Alright, Ill tell you just a little about blending just this once. In my book there are generally three ways to blend colors.
Method One: Blending on the pallet
This is a fairly easy method of blending colors. What makes it simple is that all the actually blending happens on the wet pallet. This in my opinion is where wet pallets really shine. By applying your two colors to the pallet and working them together you can blend from high to low concentration of colors creating a smooth gradient. You then simply apply the correct shade to your miniature. This method allows you the luxury of seeing your color transitions on the wet pallet before you apply them to the miniature which is super helpful and takes most of the guess work out of it. This method also offers the luxury of quickly re-blending your color mixes and working back and forth between your colors while in the middle of the painting. Over all I prefer this method.
Method Two: Wet Blending
I consider this the most dangerous of the three blending methods I'm going to talk about here. Why dangerous? Well do you remember my warning about touching paint that is still wet but drying? Yep, your going to violate that little rule when you wet blend. In short wet blending requires you to paint two different colors and while they are literally still wet brush them together to be mixed on the surface of the miniature its self. The use of a drying retarder here is of great benefit as it allows you more work time. The advantage of this method is you are blending directly on the miniature so you are seeing what its going to look like. Its also much easier to rework your colors are everything is happening on location. Need a little more blue? Just add it.
Now the downsides are worth some serious mention. First your working in wet paint that is drying. If you work too long you risk tearing the half dry paint and causing a mess that's hard to fix. Secondly is paint thickness. Its very hard to keep your paints thin and lying flat on the miniature when your building them up so quickly by blending on the miniature. Third its very easy to get in a hurry when your quickly working against your drying time. Honestly this method offers some great advantages but its easy to mess up and harder to fix. Just be careful.
Method Three: Faking it
Fake blending? Yep, its a thing you can do. How? remember that acrylic paint is semi-transparent. By painting in ultra thin layers you can actually see though to the bottom layer. As you work between your two colors the areas of overlap with thin paint will blend allowing the bottom color to show through. This is very similar to a localized wash but takes quite a bit of time to accomplish. Some of the best painters in the business use this technique to accomplish amazing blends. For the most part combine this with Method one for best success and to cut some time off. Remember this comes from the many layers approach to painting. So if your counting your layers avoid this approach.
Wait painting yellow is an advanced technique? Its just a normal color right? Yea... well... kinda... See the problem with all yellows made by every single company on the planet is there all super super thin paints and have zero coverage. If your a heavy handed painter who likes to paint it once and be done. I strongly suggest never trying to paint much yellow. To successfully paint yellow I strongly suggest painting over white. Covering over any other color is very difficult. Fixing places where a darker color drips onto yellow is also an issue. Instead of painting over the dark blotch like you normally would with your yellow. Take some white and paint that over it first. then paint your yellow. Unless that is, you are fond of using five to seven coats of paint?
Now if you have to paint Yellow over a dark color in general there is a Games Workshop product I will recommend. I do this through gritted teeth as I don't like their paints because of the pots they come in which are awfully wasteful. That said the GW Foundation paints have so much pigment in them you can cover black in one coat. Use one of their medium yellows to do your base coat then work up to a lighter yellow until you achieve the color your looking for.
Dry brushing is a favorite technique among many miniature painters. Some of whom have perfected it into a new art form. Yet its has its limits. I was once told long ago that no professional uses dry brushing if they can avoid it. Why? Because its imprecise. Your flinging your brush all over the miniature hitting every raised surface in the hope of leaving a little paint on it at random. Professionals despise random. We put color where we want color. Dry brushing is not blending, its just a way of placing a distinct layer of paint onto the miniature. It can look like blending if using very little paint built up slowly. But its not blending.
If you want to produce a professional look your going to have to learn blending in one form or another. Dry brushing can occasionally be useful for hitting very small raised detail that for whatever reason defies normal approaches. But the sooner you move away from it the sooner your going to be on your way to become a real artist.
If you want to be a great miniature artist your best path is to invest in your own personal education. No! Don't go to the local collage and talk to their art department about enrolling. Its a waste of money and the moment they find our your painting miniatures they will have you exploring new mediums. That's fine of course if you want to be something other than a miniature painter. But to be a miniature painter your going to have to study miniature painting. And fortunately for all of us because of the internet you can do that from home or work (assuming your boss isn't looking) for free.
Ok so your going to teach yourself about painting. Umm... So how exactly do you do that? Speaking for myself I follow other painters. I read their painting blogs and study their work. If I see a miniature that just floors me I will get as large a picture of it as I can and study it, trying to figure out how they did what they did. Finding step by step demonstrations are fantastic windows into the painting process. While some people really like painting videos I have generically found that most of them dont take you beyond the most basic of painting techniques. Even videos by well known artist can be dull and uninformative once you understand basic techniques.
The other thing you can do is experiment. Try new things. Have you seen a technique done? Then its time to do it yourself and see if you can copy what you have seen. Do not be afraid of failure, we all fail. Success is built upon many, many failures.
To Be Continued...
Painting in layers
You have already heard of highlights and Shadows. What you need to realize is there is no correct number of layers. I might say that painting to Level 3 is two highlights or two shadows but in reality when your going all out there is no limit. You shadow until the shadows look right. Shadows may even be different colors from the base color. Probably its best to say that while there is no "right" shadow or highlight there are however many "wrong" ones. All of this is a matter of experience. Your not going to get it reading articles your going to get it by doing it and experimenting. If there is anything I can share its that you need to be unafrade of failure. You will find no greater teacher than failure.
Pro Painting Tip
Many exceptional painters believe that all highlighting and shadowing should be done between Pure White and Pure Black. This means if they are painting red the darkest shadow will actually be black and the highest highlight will be pure white. This may be extreme but it does create a dynamic effect. None the less there are other theories about how light or dark once should paint a surface. Don't forget that your base coat should remain about 50% of the total surface color, otherwise your going to risk confusing the eye as to what color you are really looking at.
Washes
Sometimes your colors just get too bright, or too light, or too washed out, or too separated because your highlights or shadows are too far apart in color. You may also simple wish to add a second color tint to the area without repainting it. To do this we create washes. A wash is paint that has been thinned down to chicken soup level. Its really colored water. Once you have it tinned properly application is easy. You simply wash the surface you wish to add color to. A few thoughts here. One thing you are going to want to watch is pooling. This is where you have too much water on the miniature. Remember when your mother gripped at you for leaving watermarks on the dishes because you didn't try them properly? Yep that can happen here. If you over wash and leave water marks your going to have to go back in with the base color (or highlight, shadow) and clean the area up before trying again. Key point here is that paint is opaque. So super thin layers can be seen through. Washes can also be uses to unify your colors. Repainting the base coat color but in a wash can help unify your highlight and shadows if they have gotten too extreme.
Color Theory
I'm not going to begin to try and teach you color theory. I'm only going to mention it here so that those of you who are unfamiliar with the term will know you need to have at least a passing understanding of the idea. Essentially color theory is the science of combining colors. Some colors work very well together some not so much. Understanding why and how to combine colors is a major part of professional painting. Good miniatures rarely look like skittles.
Here is a starting point.
http://www.colormatters.com/color-and-d ... lor-theory
Blending
Ah blending if I let myself I could talk about this one for hours. But I'm not going to do that to you. No I think Ill just mention its existence and let all of you roam the earth searching in vain for some understanding of this arcane art passed down through the generations. Humm... no wait that doesn't sound fair ether. Alright, Ill tell you just a little about blending just this once. In my book there are generally three ways to blend colors.
Method One: Blending on the pallet
This is a fairly easy method of blending colors. What makes it simple is that all the actually blending happens on the wet pallet. This in my opinion is where wet pallets really shine. By applying your two colors to the pallet and working them together you can blend from high to low concentration of colors creating a smooth gradient. You then simply apply the correct shade to your miniature. This method allows you the luxury of seeing your color transitions on the wet pallet before you apply them to the miniature which is super helpful and takes most of the guess work out of it. This method also offers the luxury of quickly re-blending your color mixes and working back and forth between your colors while in the middle of the painting. Over all I prefer this method.
Method Two: Wet Blending
I consider this the most dangerous of the three blending methods I'm going to talk about here. Why dangerous? Well do you remember my warning about touching paint that is still wet but drying? Yep, your going to violate that little rule when you wet blend. In short wet blending requires you to paint two different colors and while they are literally still wet brush them together to be mixed on the surface of the miniature its self. The use of a drying retarder here is of great benefit as it allows you more work time. The advantage of this method is you are blending directly on the miniature so you are seeing what its going to look like. Its also much easier to rework your colors are everything is happening on location. Need a little more blue? Just add it.
Now the downsides are worth some serious mention. First your working in wet paint that is drying. If you work too long you risk tearing the half dry paint and causing a mess that's hard to fix. Secondly is paint thickness. Its very hard to keep your paints thin and lying flat on the miniature when your building them up so quickly by blending on the miniature. Third its very easy to get in a hurry when your quickly working against your drying time. Honestly this method offers some great advantages but its easy to mess up and harder to fix. Just be careful.
Method Three: Faking it
Fake blending? Yep, its a thing you can do. How? remember that acrylic paint is semi-transparent. By painting in ultra thin layers you can actually see though to the bottom layer. As you work between your two colors the areas of overlap with thin paint will blend allowing the bottom color to show through. This is very similar to a localized wash but takes quite a bit of time to accomplish. Some of the best painters in the business use this technique to accomplish amazing blends. For the most part combine this with Method one for best success and to cut some time off. Remember this comes from the many layers approach to painting. So if your counting your layers avoid this approach.
Pro Painting Tip
Keep a Painting Diary. Record all your paint colors and blends for a project in a notebook or a text file on your computer. While you may feel your memory is just fine you will be surprised when you return to a miniature in six months and cant remember what two colors you blending together and in what ratio to achieve a particular effect. This is most annoying when you have twenty more miniatures you want to do the exact same as the one six months before.
Painting Yellow
Wait painting yellow is an advanced technique? Its just a normal color right? Yea... well... kinda... See the problem with all yellows made by every single company on the planet is there all super super thin paints and have zero coverage. If your a heavy handed painter who likes to paint it once and be done. I strongly suggest never trying to paint much yellow. To successfully paint yellow I strongly suggest painting over white. Covering over any other color is very difficult. Fixing places where a darker color drips onto yellow is also an issue. Instead of painting over the dark blotch like you normally would with your yellow. Take some white and paint that over it first. then paint your yellow. Unless that is, you are fond of using five to seven coats of paint?
Now if you have to paint Yellow over a dark color in general there is a Games Workshop product I will recommend. I do this through gritted teeth as I don't like their paints because of the pots they come in which are awfully wasteful. That said the GW Foundation paints have so much pigment in them you can cover black in one coat. Use one of their medium yellows to do your base coat then work up to a lighter yellow until you achieve the color your looking for.
Why Dry Brushing is Evil
Dry brushing is a favorite technique among many miniature painters. Some of whom have perfected it into a new art form. Yet its has its limits. I was once told long ago that no professional uses dry brushing if they can avoid it. Why? Because its imprecise. Your flinging your brush all over the miniature hitting every raised surface in the hope of leaving a little paint on it at random. Professionals despise random. We put color where we want color. Dry brushing is not blending, its just a way of placing a distinct layer of paint onto the miniature. It can look like blending if using very little paint built up slowly. But its not blending.
If you want to produce a professional look your going to have to learn blending in one form or another. Dry brushing can occasionally be useful for hitting very small raised detail that for whatever reason defies normal approaches. But the sooner you move away from it the sooner your going to be on your way to become a real artist.
Research
If you want to be a great miniature artist your best path is to invest in your own personal education. No! Don't go to the local collage and talk to their art department about enrolling. Its a waste of money and the moment they find our your painting miniatures they will have you exploring new mediums. That's fine of course if you want to be something other than a miniature painter. But to be a miniature painter your going to have to study miniature painting. And fortunately for all of us because of the internet you can do that from home or work (assuming your boss isn't looking) for free.
Ok so your going to teach yourself about painting. Umm... So how exactly do you do that? Speaking for myself I follow other painters. I read their painting blogs and study their work. If I see a miniature that just floors me I will get as large a picture of it as I can and study it, trying to figure out how they did what they did. Finding step by step demonstrations are fantastic windows into the painting process. While some people really like painting videos I have generically found that most of them dont take you beyond the most basic of painting techniques. Even videos by well known artist can be dull and uninformative once you understand basic techniques.
The other thing you can do is experiment. Try new things. Have you seen a technique done? Then its time to do it yourself and see if you can copy what you have seen. Do not be afraid of failure, we all fail. Success is built upon many, many failures.
To Be Continued...
Last edited by godsgopher on Thu Sep 18, 2014 4:38 pm, edited 9 times in total.

Re: How to Paint Robotech Tactics
Really loving all this good info! Thanks! 
-
Phaze

- Megaversal® Ambassador Coordinator
- Posts: 407
- Joined: Fri Jun 14, 2013 9:00 am
- Comment: Pirate Wisdom:
Rum is a journey, and a destination. - Location: Chesterton, IN
Re: How to Paint Robotech Tactics
I am not engaging in a brush discussion...  Everyone has their personal preferences. With that said, you may not need to spend $20 + on a good natural brush. Look around online for art supply stores...real art supply stores, so get off of the Hobby Lobby and Michaels websites.
I have found good suppliers of Kolinsky natural brushes for alot less than 20$ each. [url]Try http://www.utrechtart.com[/url].
Also... a good brush cleaner is awesome for restoring brushes to a new like condition.
Like http://www.utrechtart.com/The-Masters-Brush-Cleaner-and-Preserver-MP-05702-001-i1007968.utrecht
I could also go into thinning paints and flow agents, but I'll save some for later...
A good brush, wet pallet, thinning agent, and flow agents took my painting skills to the next level.
I went from base coat, color, and a quick dip in a wash( a minimal paint job )... to this:
http://s56.photobucket.com/user/Jakovaltrade/media/Warhammer%2040K%20-%20General/DSCI0282.jpg.html?sort=3&o=1#/user/Jakovaltrade/media/Warhammer%2040K%20-%20General/DSCI0282.jpg.html?sort=3&o=1&_suid=140923700036801415106801440683
In just less than a month. While I don't consider it professional quality, it still represents a huge jump in my ablility as a painter. Skill is one thing, but to take your skill and get the best out of it, you need the right tools.
I'll still enjoy watching you get blown off the table while you stare in helpless wonder at Phaze's marching legions of colored perfection. -- Godsgopher
-
godsgopher
- Wanderer
- Posts: 91
- Joined: Mon Aug 18, 2014 11:57 am
Re: How to Paint Robotech Tactics
Phaze I followed up that link. Wow! Windsor and Newton series 7's are back in stock!!! They have been held up by legal crap from being imported into the US for almost a year now. My last brush was imported from England at considerable cost. This is great news I know where some of my next paycheck is going to!
Thanks for the support on the page. I'm very glad to see there are other painters where who are excited to make RTT look as great on the table as it did in the show.
Thanks for the support on the page. I'm very glad to see there are other painters where who are excited to make RTT look as great on the table as it did in the show.
-
Dirty Herby
- D-Bee
- Posts: 16
- Joined: Wed Jul 30, 2014 6:52 pm
Re: How to Paint Robotech Tactics
godsgopher wrote:Being a Painting Factory
But I have so much stuff!! Well break it down into manageable lots. Lets start with 12 Regult Battle Pods. There all going to be identical in color if not poses. Line them up on your table and pick your first color. Paint that color on all of them on the same places. Be consistent, be uniform. Pick your next color, do the same with it. Then your next, your next, your next. congratulations you have finished 12 Battle pods. This is how your going to paint large numbers of units.
I call this "assembly line painting" and it really is the best way to paint a lot of figures the same way in a short amount of time. You the painter just need to decide, in advance, what is "good enough" for you then paint the figures to that level of detail.
Great write up Godsgopher.
Re: How to Paint Robotech Tactics
Wouldn't mind seeing a Youtube video on this when the time comes. I know I'll need every little bit of help I can get.
-
godsgopher
- Wanderer
- Posts: 91
- Joined: Mon Aug 18, 2014 11:57 am
Re: How to Paint Robotech Tactics
I would love to be able to assist with a video. Unfortunately I don't have any of the equipment needed to show what I do, nor the knowledge in how to use it. Fortunately there are many, many painters who have taken to YouTube. Many of them are very skilled and can be a great influence.
I'm of course willing to assist with whatever I can and am always open to questions. Ill always do my best to find you an answer or point you to where you can find one if I don't know.
I'm of course willing to assist with whatever I can and am always open to questions. Ill always do my best to find you an answer or point you to where you can find one if I don't know.
-
Shawn Merrow

- Palladium Books® Freelance Writer
- Posts: 2493
- Joined: Sat Sep 30, 2000 1:01 am
- Comment: For the glory of Zeon and Zerebus, Sieg Zeon!
2D6 Palladium Forum History Geek Points - Location: Pasco, WA, USA
- Contact:
Re: How to Paint Robotech Tactics
Dirty Herby wrote:godsgopher wrote:Being a Painting Factory
But I have so much stuff!! Well break it down into manageable lots. Lets start with 12 Regult Battle Pods. There all going to be identical in color if not poses. Line them up on your table and pick your first color. Paint that color on all of them on the same places. Be consistent, be uniform. Pick your next color, do the same with it. Then your next, your next, your next. congratulations you have finished 12 Battle pods. This is how your going to paint large numbers of units.
I call this "assembly line painting" and it really is the best way to paint a lot of figures the same way in a short amount of time. You the painter just need to decide, in advance, what is "good enough" for you then paint the figures to that level of detail.
Great write up Godsgopher.
I was taught by some old school wargamers over 20 years ago that was the best way to paint an army of the same figure. It worked well for me when painting my 40K armies.

"Flandre, no Molotov cocktails indoors, please." - Hime from Princess Resurrection
-
Carl Gleba

- Palladium Books® Freelance Writer
- Posts: 3173
- Joined: Fri Oct 06, 2000 1:01 am
- Comment: Lord of Chaos!
- Location: Rome, NY USA


-
godsgopher
- Wanderer
- Posts: 91
- Joined: Mon Aug 18, 2014 11:57 am
Re: How to Paint Robotech Tactics
Thank you, I need to finish it but this has been an extremely busy week. Ill try and get started on the Advanced section soon.
Re: How to Paint Robotech Tactics
godsgopher wrote:I would love to be able to assist with a video. Unfortunately I don't have any of the equipment needed to show what I do, nor the knowledge in how to use it. Fortunately there are many, many painters who have taken to YouTube. Many of them are very skilled and can be a great influence.
I'm of course willing to assist with whatever I can and am always open to questions. Ill always do my best to find you an answer or point you to where you can find one if I don't know.
Ya, I've seen some of them. Though I hope to see some on Tactics specifically. And again, thanks for the info!
-
jedi078

- Champion
- Posts: 2360
- Joined: Wed May 04, 2005 8:21 pm
- Comment: The next group of player characters to surrender in one of my games are going to play Russian roulette.
- Location: Salem, Oregon
Re: How to Paint Robotech Tactics
Thanks for the info. I've never assembled or painted minis before, but I've been building model aircraft (usually in 1/72 scale) since I was like 8 or 9 years old.
With most of my builds I pre-fit the pieces to see where I might/will have seam issues. Then I prime the pieces (usually in grey) and then do some pre-assembly before painting the pieces their primary color. I then look at the decals and decide which ones I can substitute with painting. Then depending on the model I'll either put it all together or apply the decals. For example with my current DYRL VE-1 I've built it to this point here before applying decals.
http://i179.photobucket.com/albums/w290 ... 6518cd.jpg
Once I have the decals applied and given the pieces a gloss lacquer coat followed by a flat lacquer coat I'll do the final assembly. Not sure what route I will go with the RRT minis.....
Some people spend an entire lifetime wondering if they made a difference in the world. But, the Marines don't have that problem".
Ronald Reagan, President of the United States; 1985
Ronald Reagan, President of the United States; 1985
-
Battle Damage
- D-Bee
- Posts: 46
- Joined: Wed Aug 06, 2014 10:08 pm
- Location: "Rest of the world". We don't matter apparently.
Re: How to Paint Robotech Tactics
If you don't want to give GW for washes, here is a recipe that I have tried and is absolutely excellent:
http://www.dakkadakka.com/dakkaforum/posts/list/261541.page
Takes a bit more effort than walking into a shop and putting money on the counter, but it does give you the flexibility of making washes in whatever colours you desire.
http://www.dakkadakka.com/dakkaforum/posts/list/261541.page
Takes a bit more effort than walking into a shop and putting money on the counter, but it does give you the flexibility of making washes in whatever colours you desire.
-
rosco60559
- Explorer
- Posts: 175
- Joined: Mon Apr 14, 2014 4:03 pm
Re: How to Paint Robotech Tactics
A nice alternative is army painter. It's a range of 42-45 paints, primers in several different colors and their washes and metallics are better than gw's. They also have their own brush range that hold up surprisingly well and are moderately priced.
-
godsgopher
- Wanderer
- Posts: 91
- Joined: Mon Aug 18, 2014 11:57 am
Re: How to Paint Robotech Tactics
Thank you everyone who is contributing. I have made large updates to the Advanced Painting Section.
-
Phaze
- Megaversal® Ambassador Coordinator
- Posts: 407
- Joined: Fri Jun 14, 2013 9:00 am
- Comment: Pirate Wisdom:
Rum is a journey, and a destination. - Location: Chesterton, IN
Re: How to Paint Robotech Tactics
Great Info! Keep it Up!
I'll still enjoy watching you get blown off the table while you stare in helpless wonder at Phaze's marching legions of colored perfection. -- Godsgopher

Re: How to Paint Robotech Tactics
Does anyone know how to post pictures of painted minis to this forum?

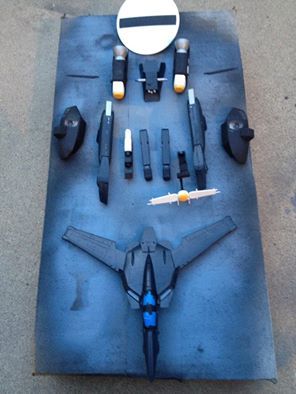
Re: How to Paint Robotech Tactics
rosco60559 wrote:A nice alternative is army painter. It's a range of 42-45 paints, primers in several different colors and their washes and metallics are better than gw's. They also have their own brush range that hold up surprisingly well and are moderately priced.
I use army painter paints and washes. They are quite good. I recommend them over GW since army painter squeeze bottles don't dry up as fast as GW pots.
-
jedi078
- Champion
- Posts: 2360
- Joined: Wed May 04, 2005 8:21 pm
- Comment: The next group of player characters to surrender in one of my games are going to play Russian roulette.
- Location: Salem, Oregon
Re: How to Paint Robotech Tactics
DocTom wrote:Does anyone know how to post pictures of painted minis to this forum?
Your going to have to host the pic on a website like photobucket and then provide the link.
Some people spend an entire lifetime wondering if they made a difference in the world. But, the Marines don't have that problem".
Ronald Reagan, President of the United States; 1985
Ronald Reagan, President of the United States; 1985
Re: How to Paint Robotech Tactics
Once painted, you will want to protect your little pieces of art. A gloss coat offers more protection but makes the miniature shine. A dull coat doesn't have the shining problem, but wears off faster or otherwise doesn't protect from little bumps and scratches as well. You can use both. Apply the gloss coat and let it dry (really, really dry -- like 24-48 hours dry), then apply the dull coat to bring down the shine.
-
Battle Damage
- D-Bee
- Posts: 46
- Joined: Wed Aug 06, 2014 10:08 pm
- Location: "Rest of the world". We don't matter apparently.
Re: How to Paint Robotech Tactics
LtPebbles wrote:Once painted, you will want to protect your little pieces of art. A gloss coat offers more protection but makes the miniature shine. A dull coat doesn't have the shining problem, but wears off faster or otherwise doesn't protect from little bumps and scratches as well. You can use both. Apply the gloss coat and let it dry (really, really dry -- like 24-48 hours dry), then apply the dull coat to bring down the shine.
As an added bonus, using two coats of varnish or equivalent like this also helps to disguise the backing film on decals and make them look 'unified' with the paint.
-
godsgopher
- Wanderer
- Posts: 91
- Joined: Mon Aug 18, 2014 11:57 am
Re: How to Paint Robotech Tactics
updated...
-
winterdyne
- D-Bee
- Posts: 26
- Joined: Wed Apr 25, 2012 7:07 am
Re: How to Paint Robotech Tactics
Here's a half-decent tutorial for decals.
http://www.winterdyne.co.uk/maz/winterd ... orial3.pdf
http://www.winterdyne.co.uk/maz/winterd ... orial3.pdf